X

Mail Backup X comes with a simple to install package. For macOS its comes as a DMG and for Windows its an downloadable exe file installer.
All you have to do is simply download the installer file and follow the onscreen instructions suggested in installation wizard. Still we are giving you a step by step tutorial on how to install Mail Backup X on your Mac and PC.
Install Mail Backup X Personal Edition on your Mac:
Step 1 : Download the DMG installer file from the Downloads Page of our website.
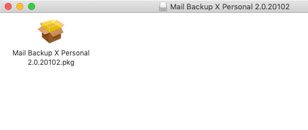
Step 2: Double click on the DMG file to Mount it. Click the icon for App to Launch the setup Wizard.
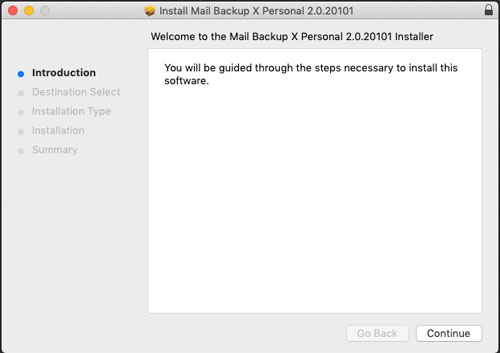
Step 3: Click Continue to proceed with the installation of Mail Backup X Personal Edition on you Mac.
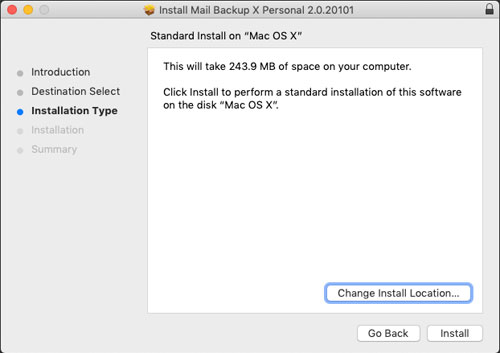
Step 4: You can leave the installation location to default set or may choose Change install location to set your custom location for installing the App. It is recommended to leavc it to default as set in the installer under Applications folder on your Mac. Please click install to proceed further.
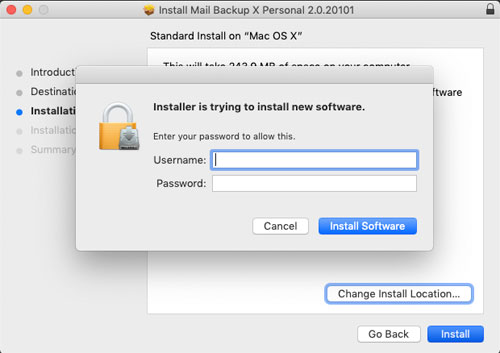
Step 5 : You will be prompted for your Mac Username and Password by macOS to allow the installation to proceed further. Please enter your credentials and macOS will proceed with installation of software.
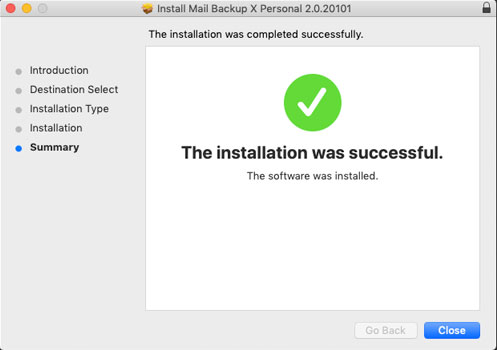
Step 6: macOS will proceed with copying the files and configuring the app for use. Once, done you will notice the message Installation was successful.
Step 7: Important Note for macOS Mojave, Catalina & Big Sur users: Extra Installation steps only to be followed in case you plan to do Apple Mail Backup
Apple restricts access to Mails, Contacts, and Calendar for third-party applications in macOS Mojave, Catalina & Big Sur.
You will need to allow & set permissions for Mail Backup X to access Mails, Calendars, and the Contacts.
Please follow the step-by-step procedure given below to ensure compatibility with macOS Mojave & Catalina.
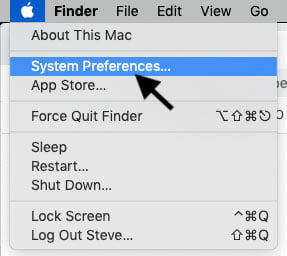
1. Please go to the “System Preferences” on your Mac,
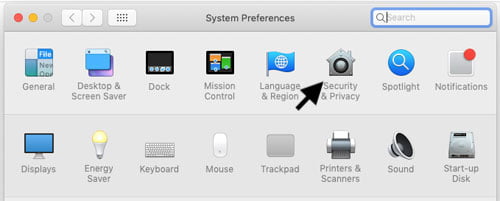
2. Open “Security & Privacy” from the top row.
3. Click on the 4th Tab “Privacy,” which is after Firewall.
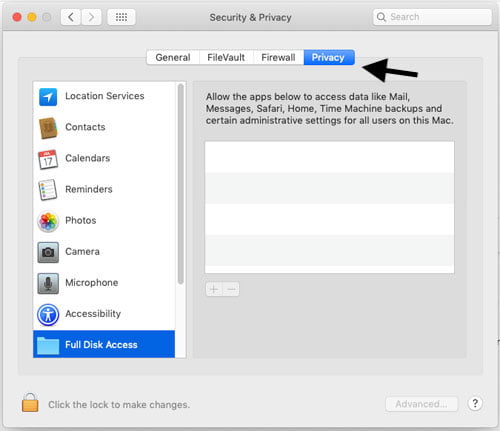
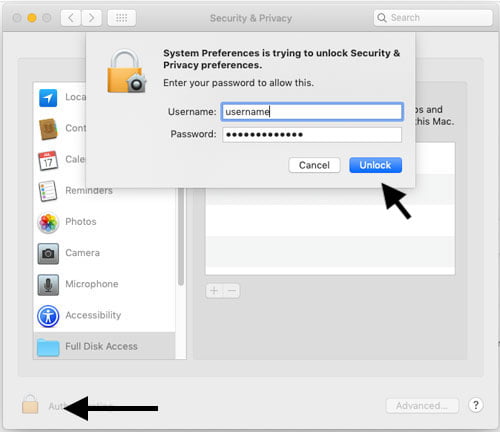
4. Then Click on “Full Disk Access.” And click the Lock icon at the bottom to unlock and allow apps to be added to allowed apps list.
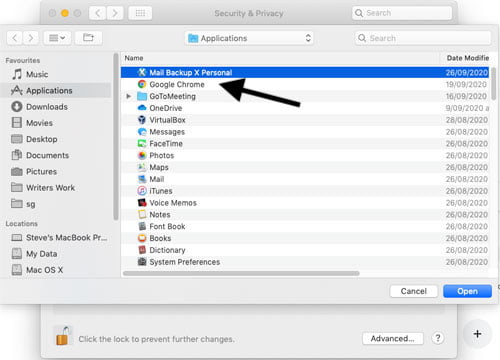
5. Click the [+] icon under the list section and Add Mail Backup X from your Application folder.
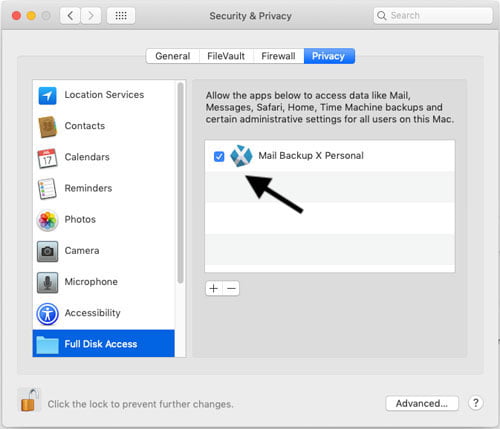
6. Now Mail Backup X is in the list.
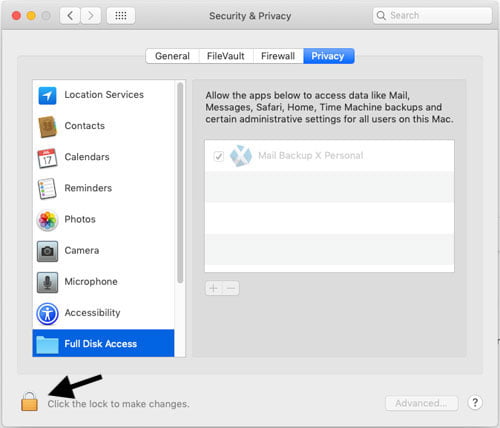
7. Click the Lock icon again to secure the settings and close preferences pane.
8. If Mail Backup X is already running in background and already installed on your system. You will get a prompt suggesting you need to quit Mail Backup X. Please click on “Quit Now.”
9. Relaunch Mail Backup X.
Install Mail Backup X Personal Edition on your Windows PC:
Step 1 : Download the latest software setup of “Mail Backup X Personal Edition” from downloads page on our website.
Step 2: Double-click on the installer file.
Step 3 : Follow on-screen instructions to complete the setup.