X

Gmail is an inseparable part of everyone’s digital life. Billions of people use Google services and Gmail is at the centre of it. Your Gmail account might hold a huge part of your professional business information which cannot be compromised. Furthermore, it cannot be denied that email services are not 100% hack proof. There have been lots of instances of email data being held by ransomware. Cyber criminals are after Gmail data all the time since they know that most users work with it because it is just so simple and convenient. Almost 3 billion people use Android and most of them use Google and Gmail services to link all apps they use. Thus, it is clear that protecting your Gmail email account is important. Now, the best way to do so is by creating local Gmail backups on your computer and keeping your data off the web. If your email data is on the internet, it can be accessed by someone even if there is a remote possibility.
It is true that there are many ways to backup emails from Gmail but most email users don’t know anything about email backups or how to get them done. Here you are going to find out the best way to backup email from Gmail. First, we are going to explore the manual method of archiving Gmail using Google takeout service. Google takeout is a service which gives you a copy of your entire Google account which also includes your Gmail email data. So many users use Google takeout to backup emails from Gmail client.
This service just takes all of your Google data and gives it to you in the form of a ZIP file. You just need to have enough time on your hands and you can use this. You can take the following steps and backup Gmail emails with it.
Step 1: Go to takeout.google.com/settings/takeout on your browser. Before you launch Google takeout, make sure that you are logged in to your Google account. After your signed in, you can go and launch Google takeout.
Step 2: You can view the type of data that you can backup with this tool. You have to find Gmail.
Step 3: Turn on the Gmail button (slider) on the right side of the screen. This will select your Gmail account to be backed up. You will be able to see an arrow on the left of this slider. If you click on it, you will see an expanded screen where you can choose the different parts of Gmail that you want to be backed up.
You can choose to include all mail or selected labels. When you are done choosing your settings, you can click on the next button.
After clicking next, you get to choose the type of file in which you want to store your Gmail backup. The default type of file is zip. You can also select the size of your archive. The maximum size which is allowed is 50 GBs but it is not recommended to make such a huge backup. You can also choose 1 GB, 2 GB, 4 GB and 10 GB etc.
The last customization which can be done is to choose how you want your data to be delivered to you. You can either choose to get these files directly to your chosen cloud service like Google drive, Dropbox or OneDrive. You can also choose to get a download link on your email. It is suggested to choose the receive download link via email options since it allows you to download your backup on your local storage.
You should know that when you backup email from Gmail on your cloud storage, it will be stored in the quota which is offered for all Google related storage. So, if you are backing up a particularly large mailbox, don’t choose the cloud option.
After choosing these, click on the Create archive button.
You will see that the archive is being created and it can take a lot of time depending upon a lot of factors. When the archive is prepared and ready to be downloaded, you will receive an email and a link to download the backup file.
Like any other process and solution, this has its own limitations.
Mail backup X is a certified method to backup email from Gmail and other email services whenever you want without needing any extra skills. In just a few steps, you will be able to create Gmail mailbox backups with absolute accuracy. This solution has been designed especially to make the process feasible for first time users or those users who don’t want to make much effort or risk their data in the process. This method is loaded with innovative features so that you get an edge over the other available options. Here are some of the top benefits of using Mail backup X as the best way to backup Gmail emails.
This is a Gmail backup solution that works automatically and does not need much input form the user. Follow these simple steps and you will be able to backup Gmail emails whenever you want.
Firstly, download and install Mail backup X tool. You can download and install the version of your choice.
Step 0: Launch the tool by double clicking on the tool icon.
Step 1: You have launched the tool and now you are at the first window where you are asked to create a new backup profile. You will see the option of setting up a new backup profile under the tasks section. Click on “setup a new backup now”

Step 2: you will be taken to the next window where you are asked to choose the email service that you want to backup. You will see different email services since this email backup tool supports more than one email service. You have to select the “Email server” option

Step 3: After clicking on “email server”, you will be brought to the next window where you will see options like Google mail, Outlook.com, Office 365, Exchange server and IMAP server. You have to select Gmail from these options and you will be taken to the next step automatically.

Step 4: You will be asked to click on continue in order to open a secure session where your email details are not going to be shared with anyone else. This is the latest method used by Google which enables users to interact with third party apps without sharing their login details and password. These details are not stored by the third-party app and are only used to access the account in order to manage it.

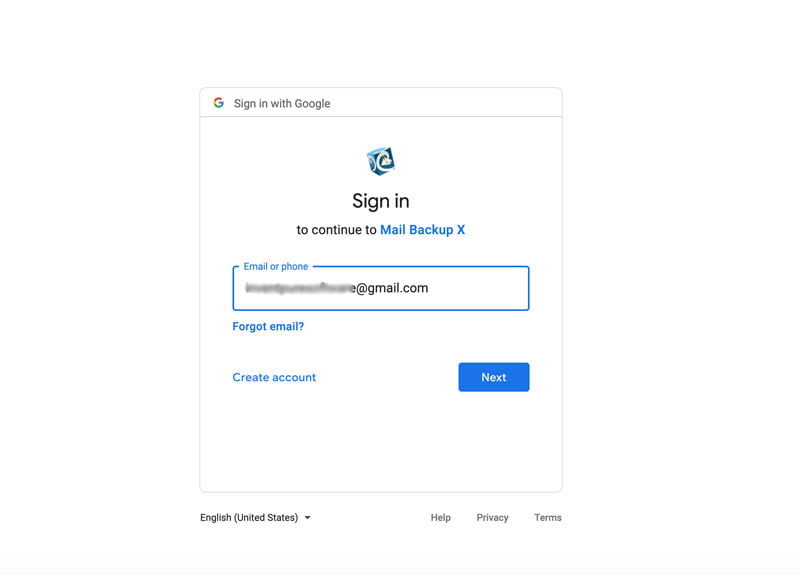
Step 5: A default Google sign in window will open where you will be asked to enter your Google username and password.
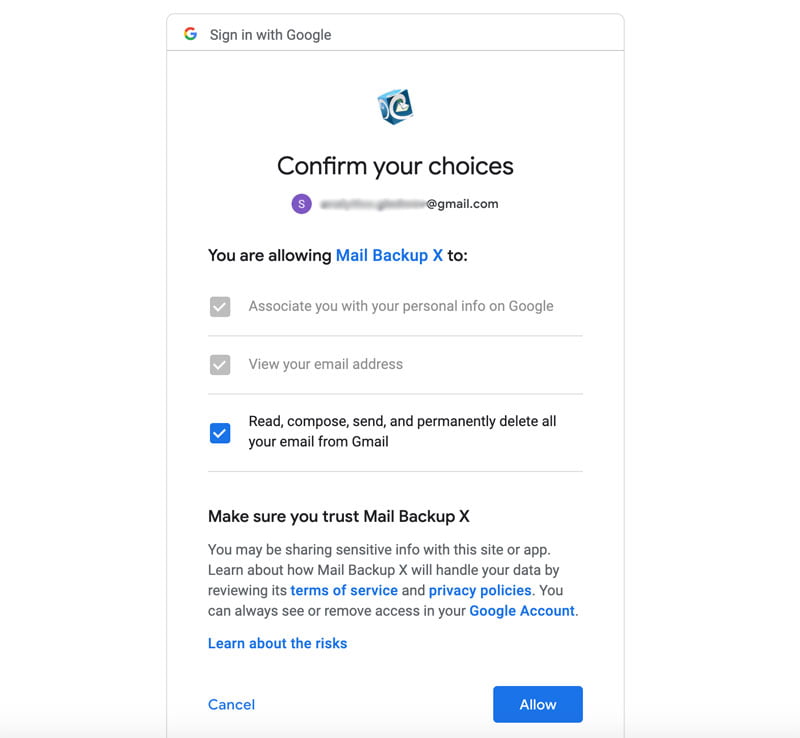
Step 6: You will be now asked to allow access to Mail backup X so that your email files can be accessed and backed up. You don’t need to worry about the security of your files since our tool is approved by Google policy and we never store your credentials. Your data is on your local device or on the cloud service of your choice.
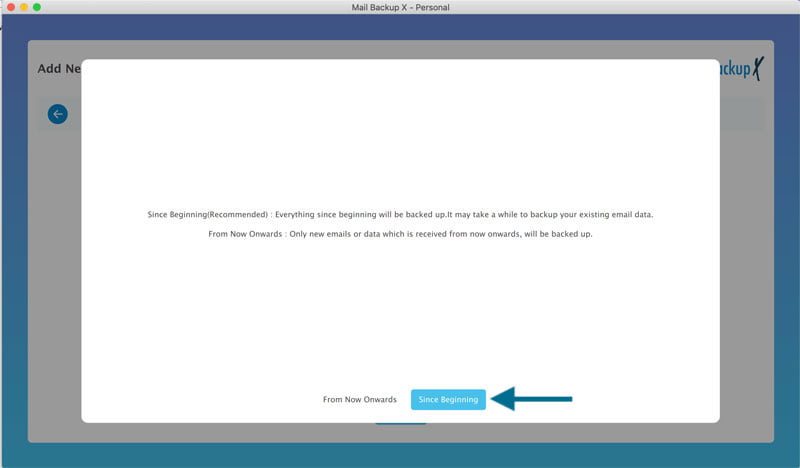
Step 6 (b) After you allow access to Mail backup X application. You will be asked whether you want to backup your emails since the first email of the mailbox or starting from this moment. It is left to the user to choose whether they want to backup their emails since the beginning of their email mailbox or from the current day. It is suggested to backup mails since the beginning. Your emails will be backed up from day one.
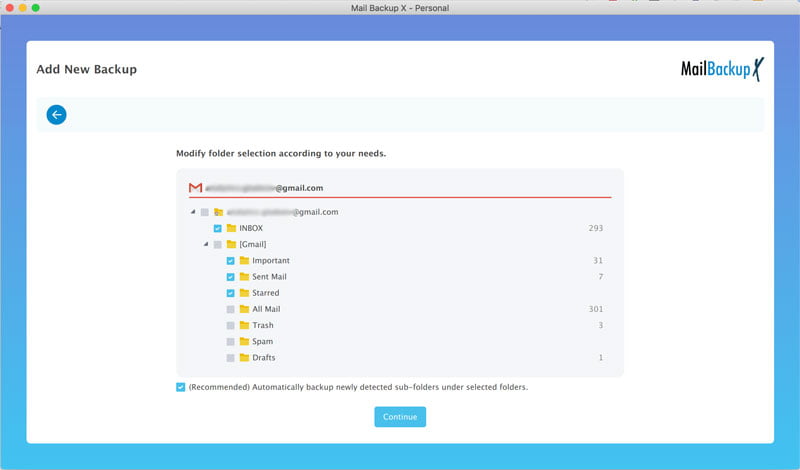
Step 7: Now you will be shown the complete mailbox folders from your Gmail email account. You can choose the folders that you want to backup and leave behind the ones that you don’t want to backup. This feature is also called selective backup. You are given the chance to ignore all empty folders too. Once you have chosen the folders that you want to backup, click on continue.
Step 8: This will bring you to the next window where you are given the option to customize your backup according to your personal preference. These are the options that you are given in this step.

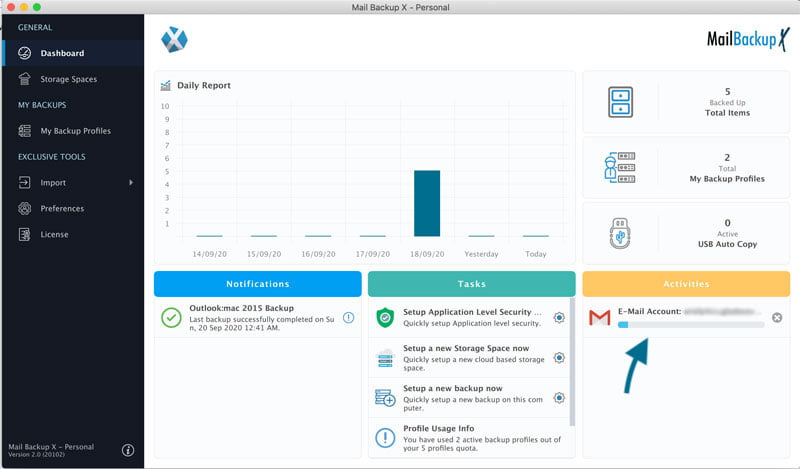
Step 9: Your backup is now started and you can view its live progress on the dashboard under the activities section. You will be able to see the progress of the backup right here on this dashboard. You will also get any critical notifications here. You can switch to any task under the task section without interrupting the process.
This was the whole process of using this Gmail backup tool for automatic email backup from Gmail. You should certainly try this.
Get the free trial of the tool in the package of your choice by clicking below.